See Hair System, Hair Node and Render Settings Node sections for more information.
This tutorial shows how to create dynamic FurryBall hair.
Tutorial

Step 1 - Preparations
Enable hair and shadows (optional) features in currently active render settings node (see Render Settings Node section).
Step 2 - Create Hair System
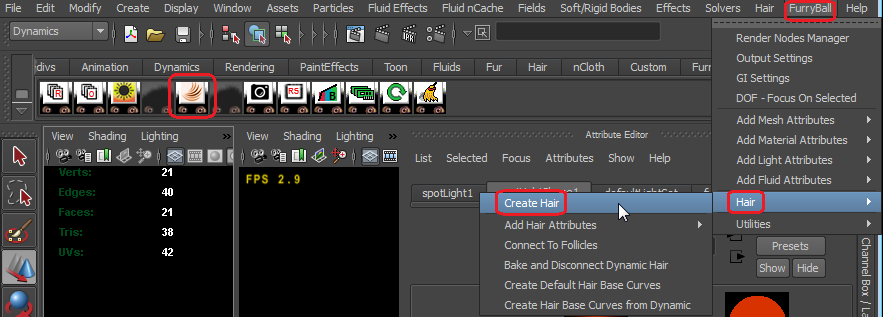
Select or create a polygonal mesh which will become a source mesh for the new hair system. Create a Maya hair system on this shape. FurryBall will use this Maya hair system for dynamics (FurryBall itself does not compute any dynamics).
Create an ordinary Maya hair shape on the selected mesh.
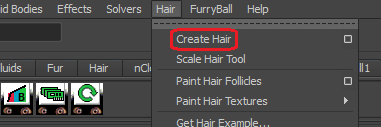
From the main menu select FurryBall -> Hair -> Create Hair or click the Create FurryBall Hair icon on the shelf (see User Interface section).
Use either the menu or the shelf icon to create hair on a selected mesh.
FurryBall hair system will be created on the selected polygonal mesh. You can start adjusting the FB hair parameters in the attribute editor (see Hair Node section).
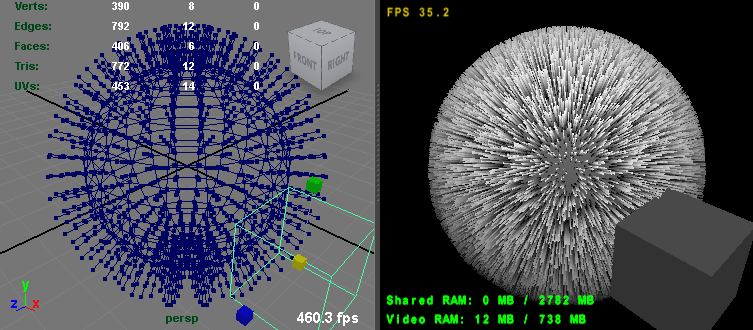
The left viewport is a default Maya perspective view and shows the control vertices of FurryBall hair guides. The right viewport is a FurryBall render and shows the final rendered hair.
Step 3 - Hair Node
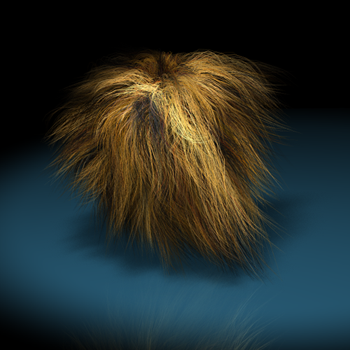
To adjust hair curves' shape, colors and other properties click on the mesh with hair, there should be a hair node tab in the Attribute Editor, select it. Now you can tune your hair system by changing parameters like Density, Waviness, Kink and many more. Textures can be attached to Color Start and Color End and some other parameters.
Please see Hair Node section for description of all attributes in the hair node.
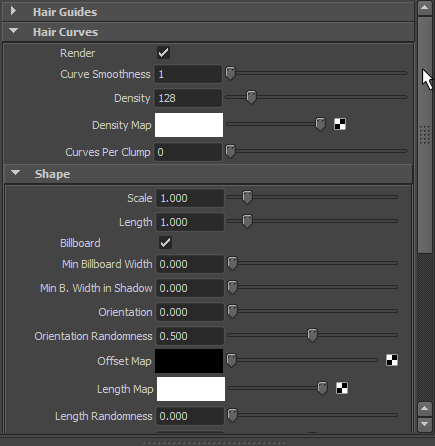
The hair settings node continues with many more attributes.
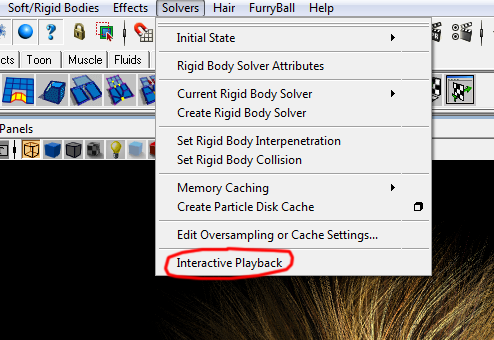
Step 4 - Interactive Dynamics
If you create FurryBall hair on a mesh to which a Maya hair system is connected, FurryBall hair system will be fully dynamic by default. Since it is based on native Maya dynamics it can be shown in action in realtime. All you need to do is going to Maya -> Dynamics -> Solvers menu and select Interactive Playback.
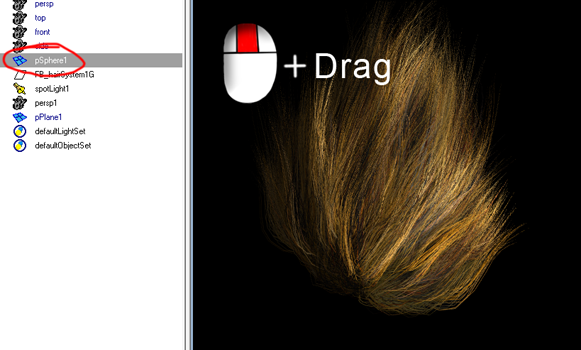
Select your mesh (source mesh for your hair system) from the Outliner. Switch to translation mode (press 'W'), click into FurryBall viewport with middle mouse button and hold it.
By moving the mouse while holding the middle button, the hair system dynamics is simulated on the fly.
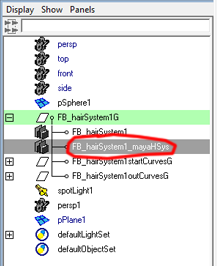
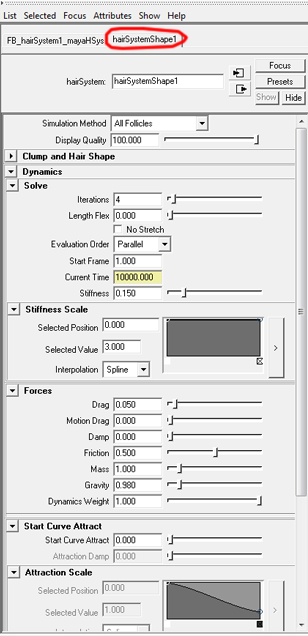
Step 5 - Maya Dynamics Settings
To adjust some dynamics parameters open outliner, select FB_hairSystem1_mayaHSys node and in attribute editor go to hairSystemShape1 (name will be different if you are not using default name). Now you can tune some dynamics parameters - for more details see Maya Help -> Dynamics.
Step 6 - More Effects (optional)
To add shadows and reflections, create a spot light and a plane under the sphere. Make the plane reflective (see Reflections tutorial) and enable shadows (see Shadows tutorial). Do not forget to enable reflections and/or shadows in your current FurryBall Render Settings node.
Created with the Personal Edition of HelpNDoc: Free HTML Help documentation generator