This tutorial will show you how to set up advanced reflections in a simple scene. See the previous tutorial on Reflections and Mesh Node section for general information.
Advanced Reflections Tutorial
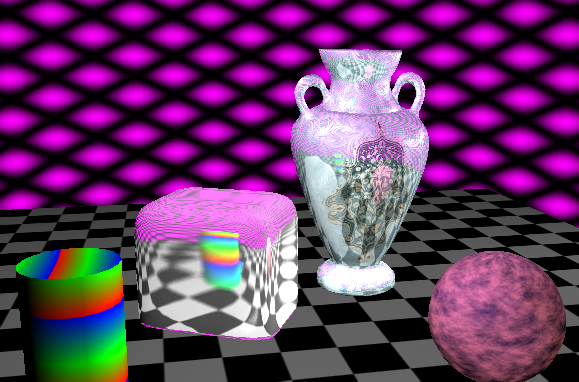
Fig 0.: Our final image. Note the geometrically correct reflection on the "rounded cube" which wouldn't be possible with simple environment maps, nor with planar reflections.
Step 1 - Preparations
First, please read the previous tutorial on Reflections. Set up your scene. In our scene, the vase and the rounded cube will reflect the rest of the scene.
WARNING: Environment reflections require that your reflected (not reflecting) geometry is at least moderately tessellated. Artefacts might appear otherwise. Be sure to tessellate or subdivide your meshes a little either using FurryBall subdivision or directly in Maya.
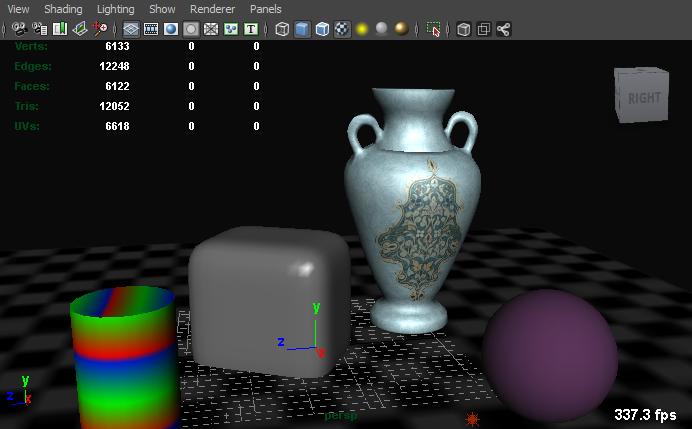
Fig. 1: Our sample scene in Maya viewport. The rounded-cube and the vase have a Blinn material and will be reflecting each other and the other objects.
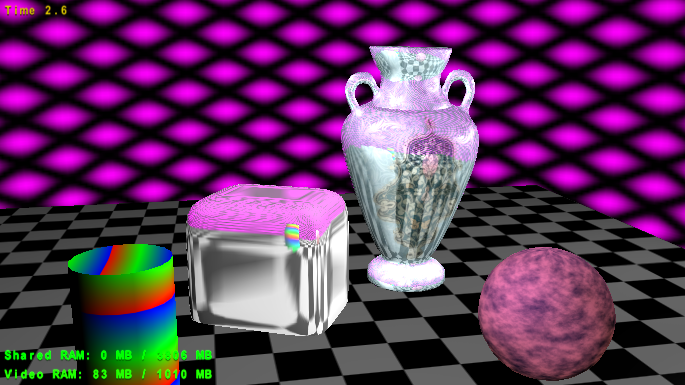
Fig. 2: Our sample scene rendered in FurryBall with basic reflections only.
Note the incorrect reflections on the rounded cube - the colored tube and everything else reflects in incorrect positions.
This might not, however, be a big issue in many scenes. When it is, let's use Advanced Reflections.
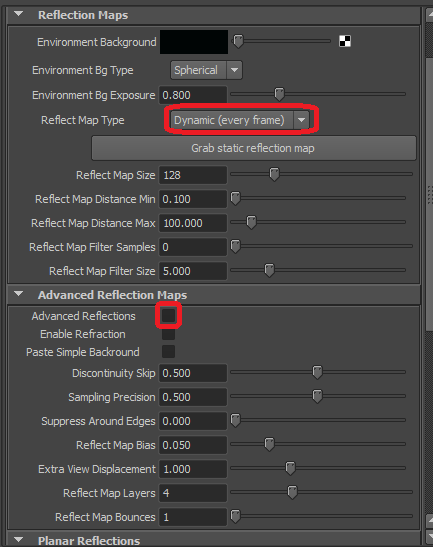
Fig. 3: With default reflections enabled, the FurryBall mesh settings looks like this. Advanced reflections are now disabled.
Step 2 - Enabling Advanced Reflections
Advanced reflections provide geometrically correct reflections. Unlike with simple reflections, scene objects will reflect exactly where they should. Furthermore, reflective objects will self-reflect their parts. To enable this, toggle Advanced Reflections in your FurryBall Mesh Settings Node under Advanced Reflection Maps. The result will be something like in Figure 4. Note the insufficient resolution on the reflective objects. This can be fixed by increasing the Reflect Map Size. Resolution of 512 is almost always sufficient. If possible, use less (256-384) and blur with Reflect Map Filter Samples and Filter Size. Also note that some scene information might be missing, which is marked by the red arrow in Fig. 4. We will fix this by increasing the number of Reflect Map Layers. The green arrow shows how geometry might leak into the next layer and we will fix this by tuning the Discontinuity Skip parameter. See Figure 5 for settings. In the next step, we will tune the settings to get nice reflections.
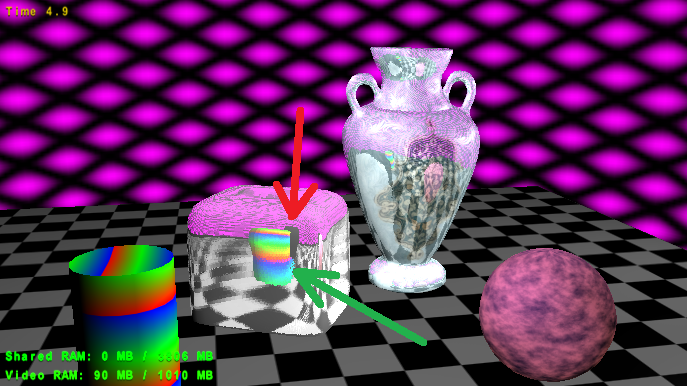
Fig. 4: Our scene with default advanced reflections enabled. The red arrow marks missing information, the green arrow leaking geometry. See next figure for settings.
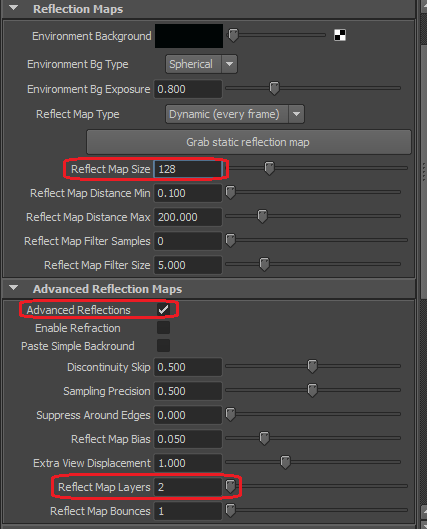
Fig. 5: Settings for the render from Fig. 4. Note the Reflect Map Size and Reflect Map Layers attributes. Both might be insufficient.
Step 3 - Tuning Advanced Reflections
In order to clear up your reflections, set the Reflect Map Size to a higher number, for example 512. Also, adjust the Reflect Map Layers parameter to at least 4. Much higher numbers (such as 8 or 10) of layers might be necessary for complex scenes. The missing part of the reflection is exactly on spots which cannot be directly seen from the object center of the reflective object. More layers correct this but also cost more time (and memory!) to render. Tune parameter Discontinuity Skip to remove the artefact marked by the green arrow in Figure 4. See Figure 6 for the result and Figure 7 for corresponding settings. Here, we also added a small blur by increasing the Reflect Map Filter Samples to 1 (this is costly) and lowering the Reflect Map Filter Size to 2, so the blur is really small. After you tune your reflections, you can also increase the overall rendering resolution in the Render Settings Node for higher overall quality.
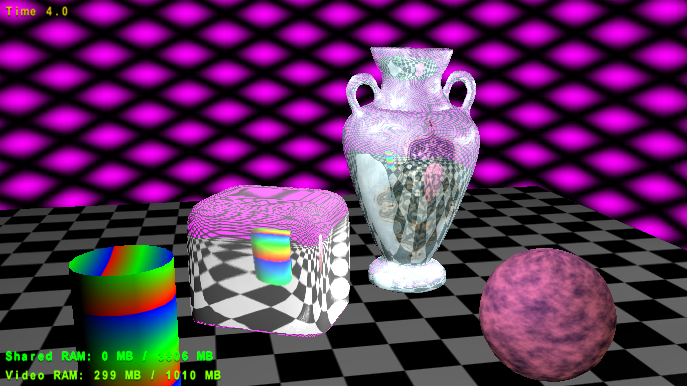
Fig. 6: Our final scene.
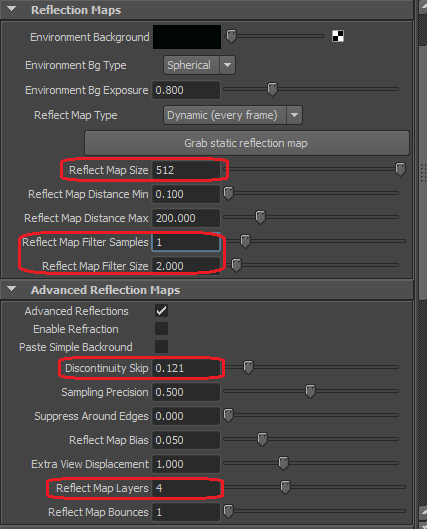
Fig. 7: Mesh Settings Node for Fig. 6.
Created with the Personal Edition of HelpNDoc: Free help authoring tool